-
AuthorPosts
-
-
The basic information for your store includes the store name and address, telephone number and email address, that appear on email messages, invoices, and other communications sent to your customers.
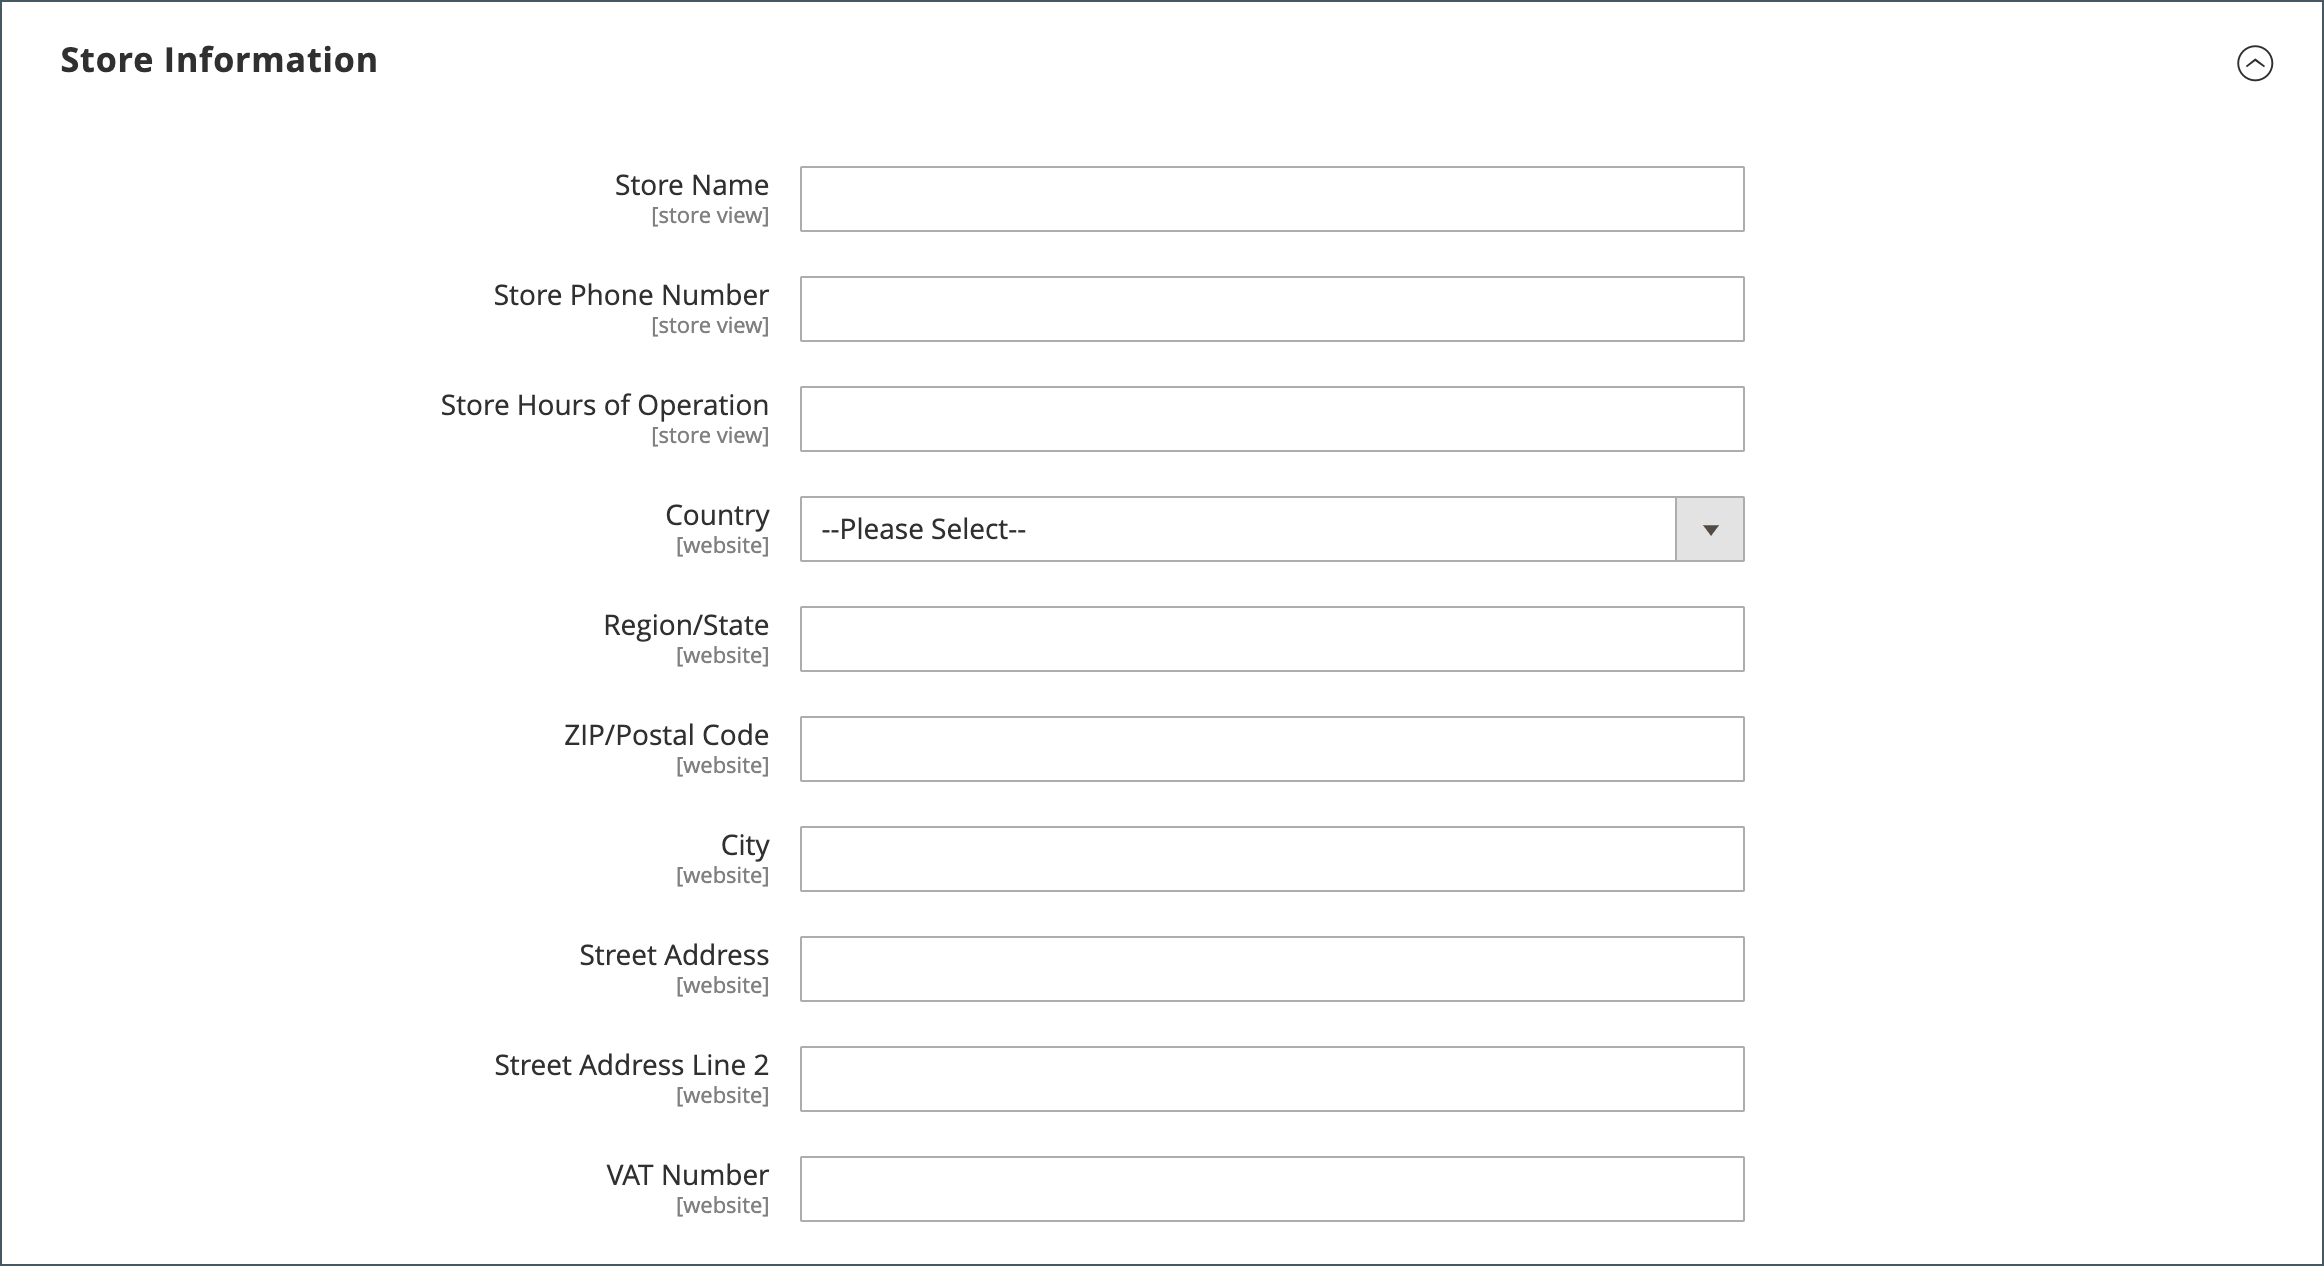
Store Information
The Store Information section provides the basic information that appears on sales documents and in other communications.
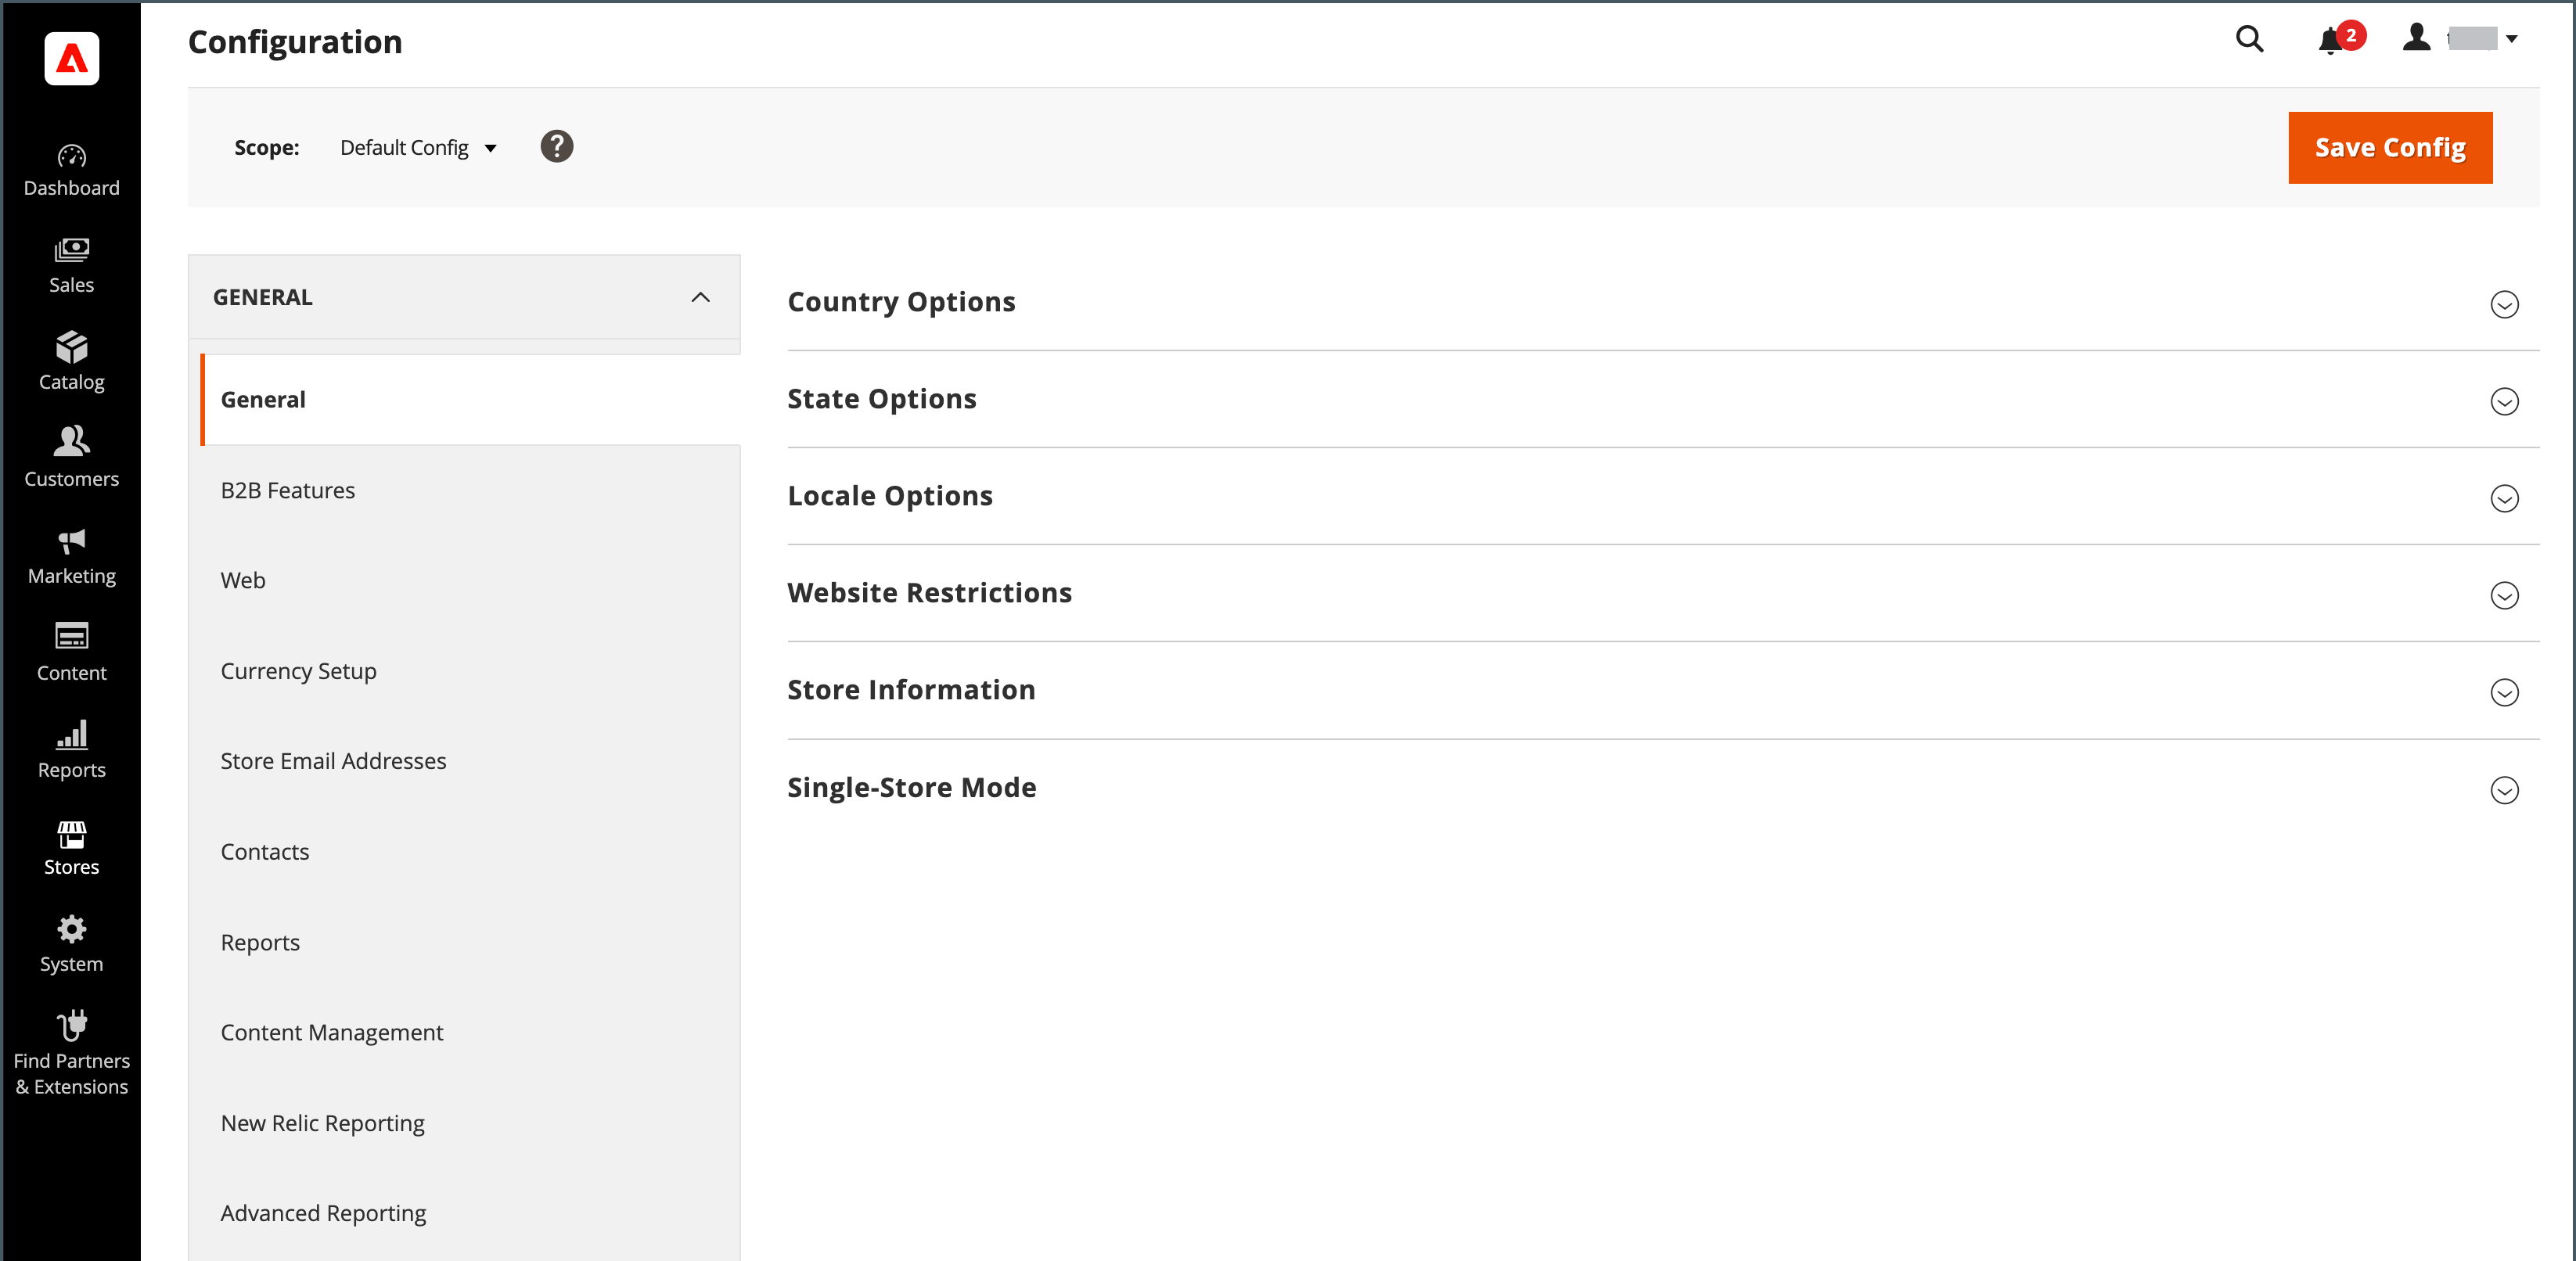
- On the Admin sidebar, go to Stores > Settings > Configuration.
- Under General in the left panel, choose General.
- Expand
 the Store Information section and do the following:
- Enter the Store Name that you want to use in all communications.
- Enter the Store Phone Number, formatted as you want it to appear.
- For Store Hours of Operation, enter the hours your store is open for business. For example: Mon – Fri, 9-5, Sat 9-noon PST.
- Select the Country where your business is located.
- Select the Region/State with the country.
- Enter the Store Address. If the address is long, continue the address on Store Address Line 2.
- If applicable, enter the VAT Number of your store.
To verify the number, click the Validate VAT Number button. To learn more, see VAT ID validation.
- When complete, click Save Config.
For more information about the Store information configuration options, see the Configuration Reference Guide.
Locale Options
The locale determines the many of the settings that are used throughout the store. Some of them are:
- Language
- Country
- Tax rate
- Currency
- Price
- Number format
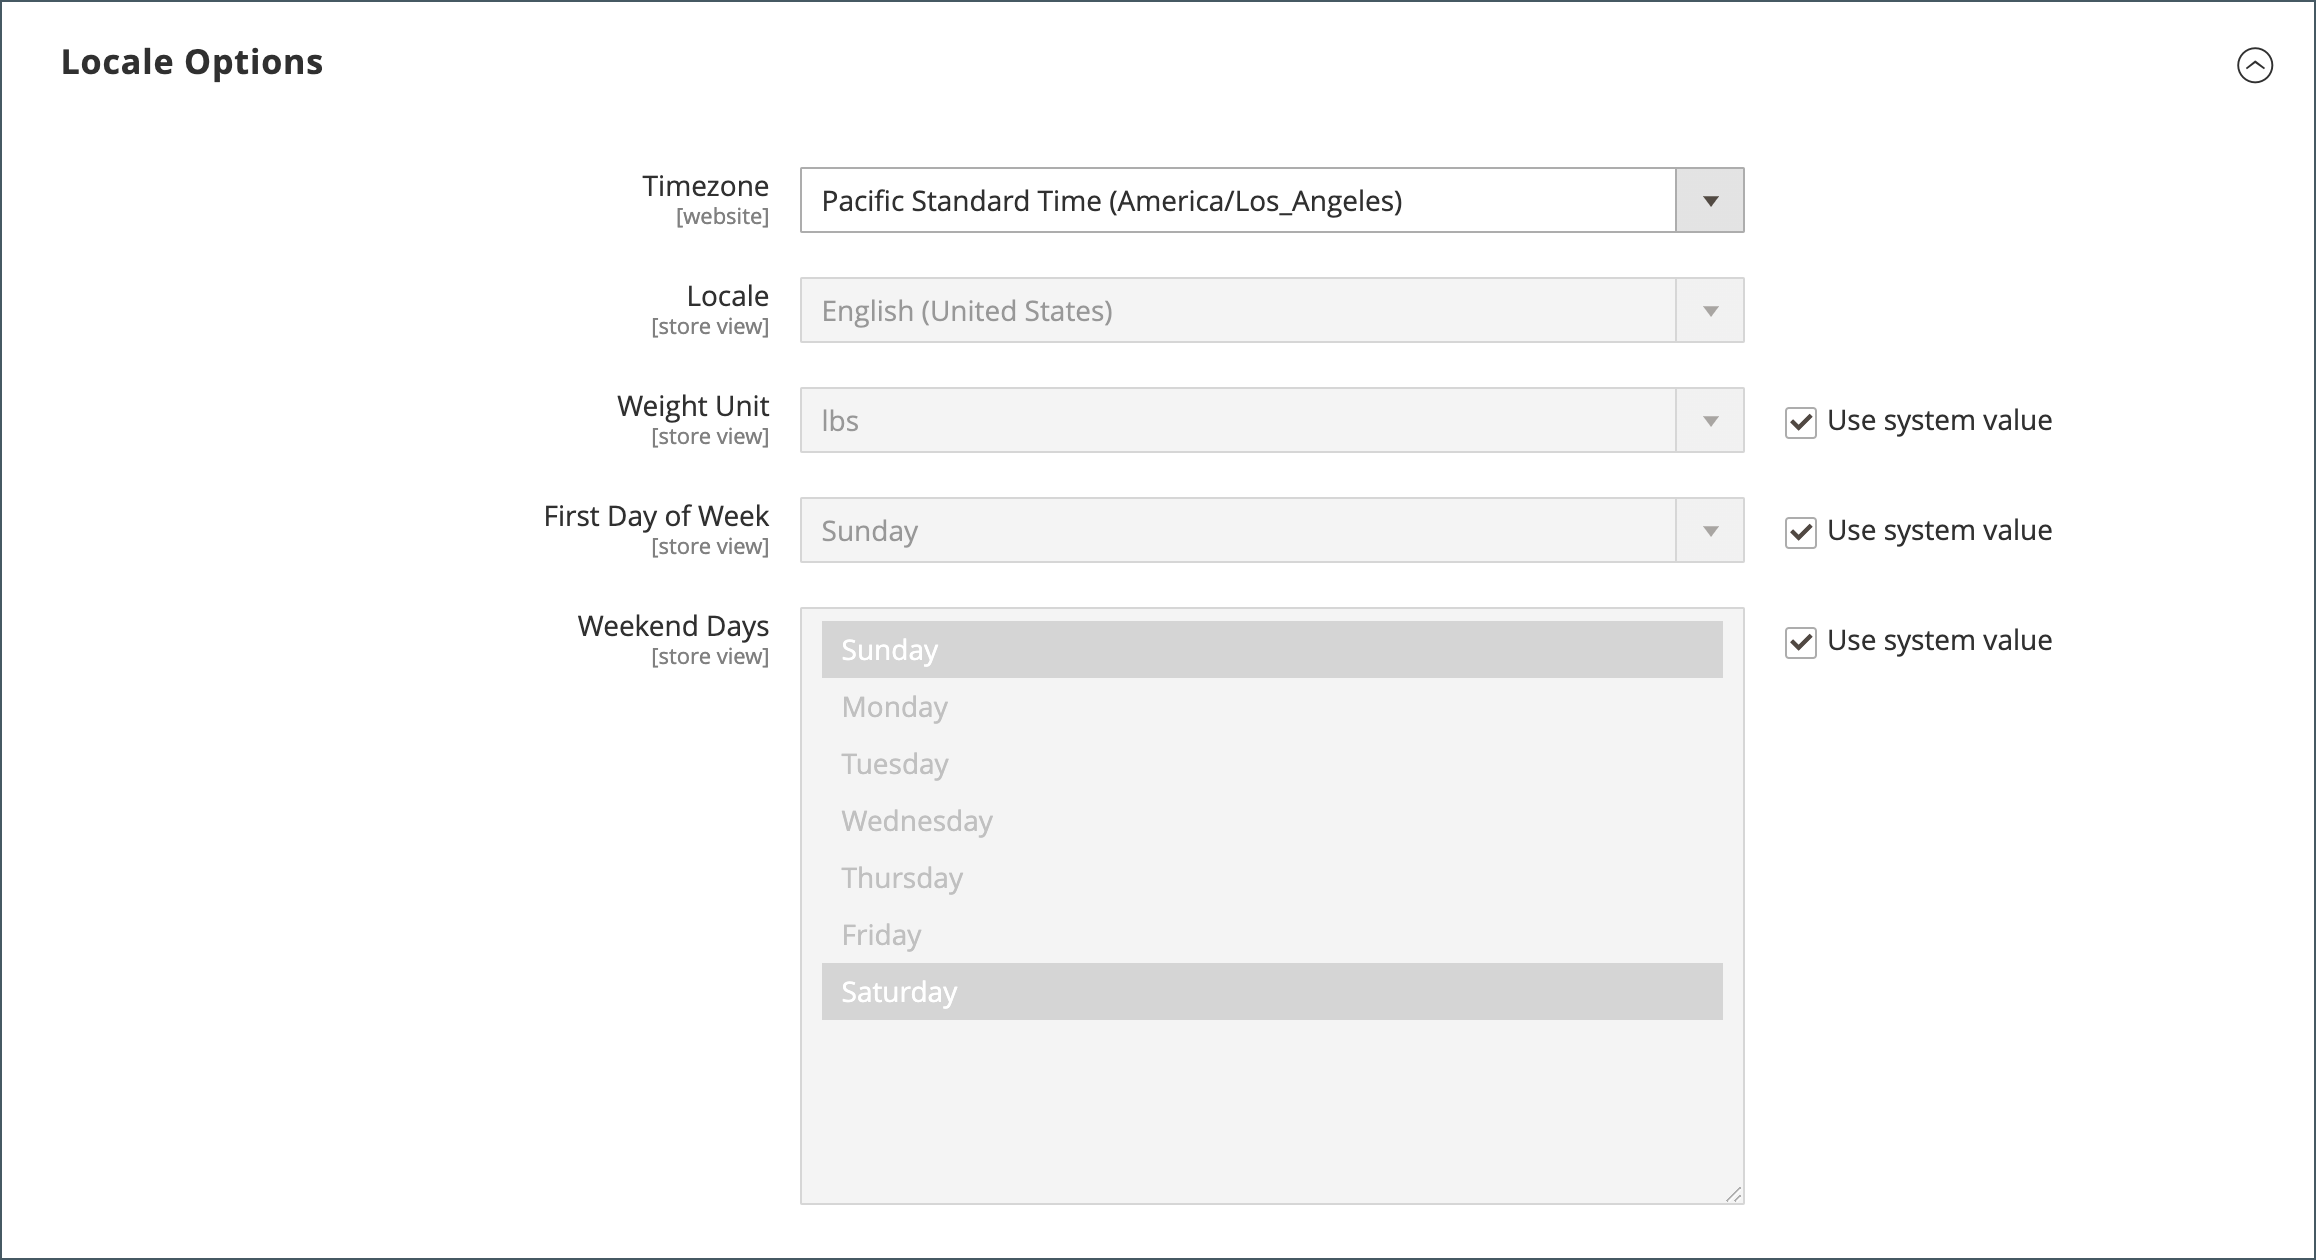
The locale setting determines the time zone and language used for each store, and identifies the days of the work week in the area.
- On the Admin sidebar, go to Stores > Settings > Configuration.
- In the left panel under General, choose General.
- Expand the Locale Options section.
- Select your Timezone from the list.
- Set Locale to the store language.
- Set Weight Unit to the unit of measurement that is typically used for shipments from your locale.
- Set First Day of the Week to the day that is considered to be the first day of the week in your area.
- In the Weekend Days list, select the days that fall on a weekend in your area.
To select multiple days, hold down the Ctrl key (PC) or the Command key (Mac) and click each item.
- When complete, click Save Config.
For more information about the Locale configuration options, see the Configuration Reference Guide.
State Options
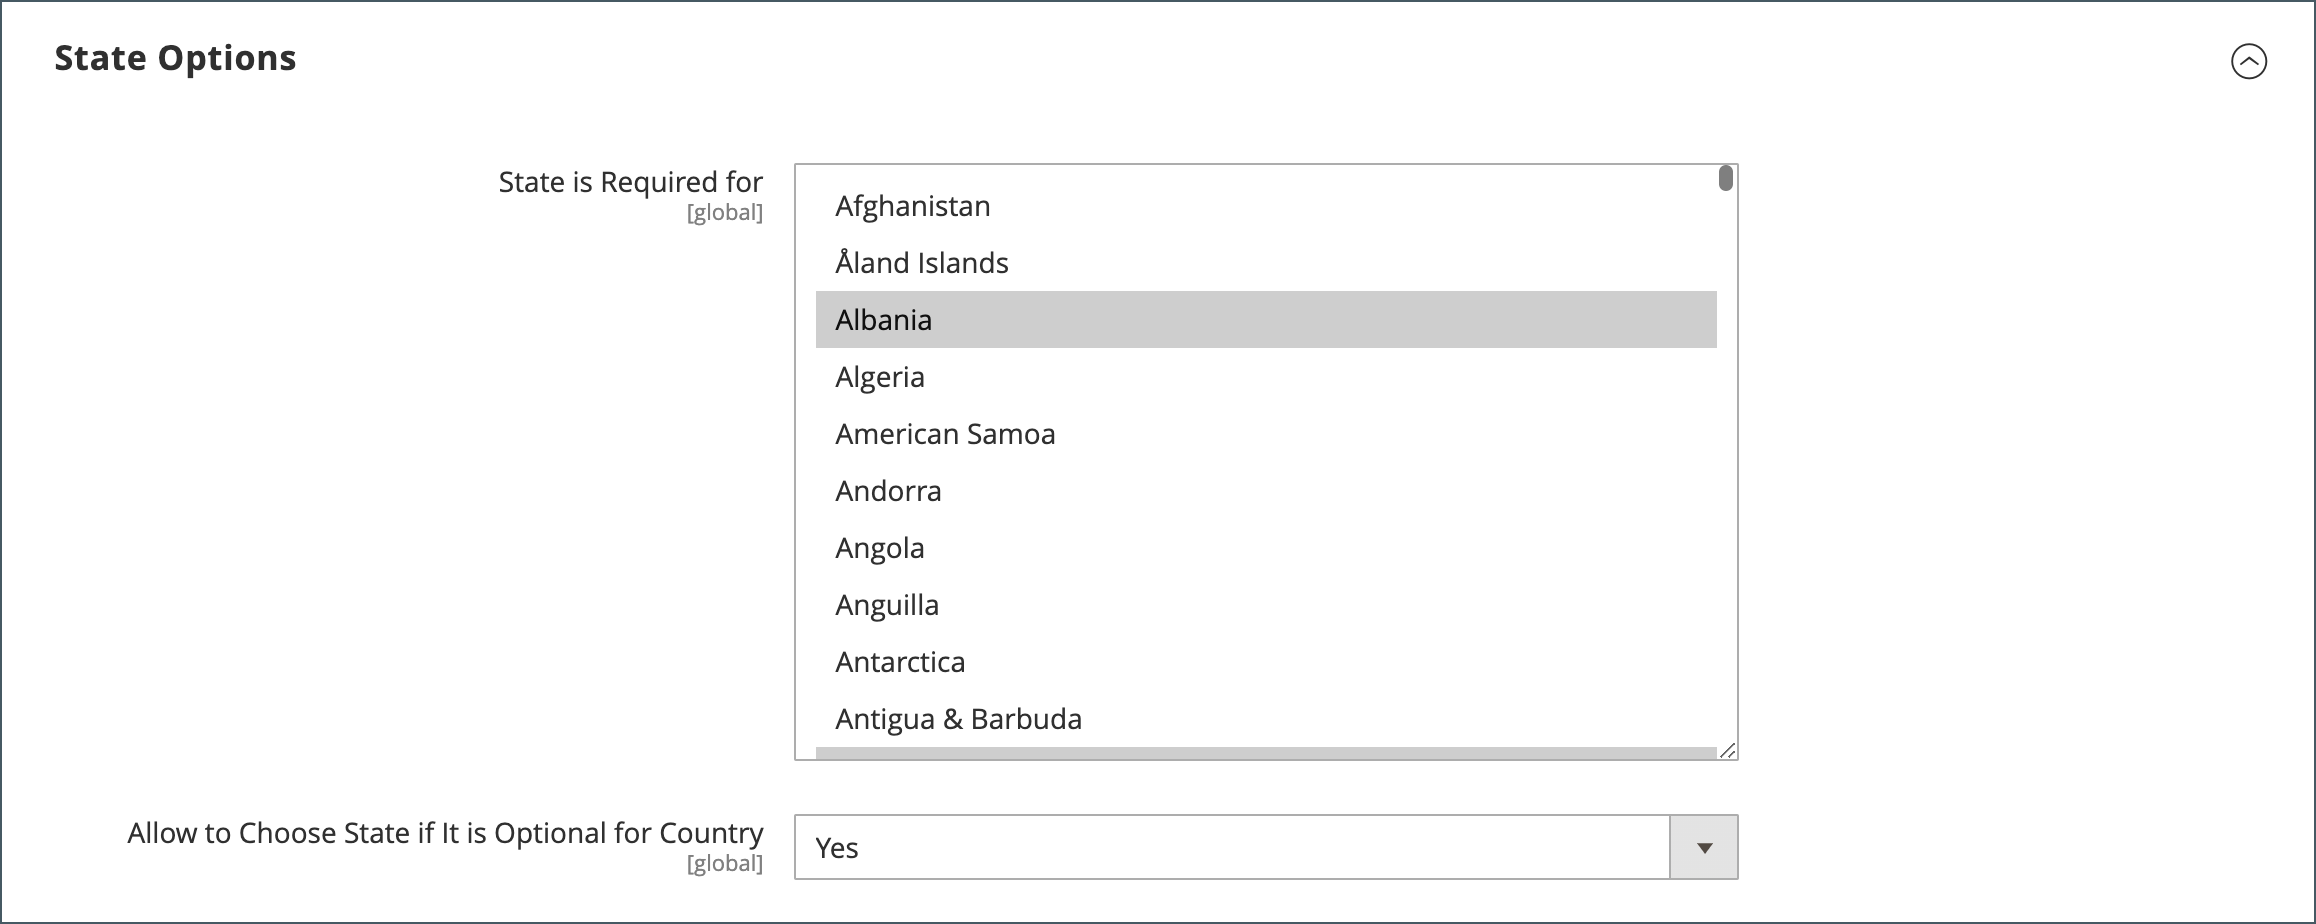
In many countries, the state, province, or region is a required part of a postal address. The information is used for shipping and billing information, to calculate tax rates, and so on. For countries where the state is not required, the field can be omitted entirely from the address, or included as an optional field.
Because standard address formats vary from one country to another, you can also edit the template that is used to format the address for invoices, packing slips, and shipping labels.
- On the Admin sidebar, go to Stores > Settings > Configuration.
- Under General in the left panel, choose General.
- Expand the State Options section and do the following:
- In the State is required for list, select each country where Region/State is a required entry.
- Set Allow to Choose State if it is Optional for Country to one of the following:
Yes– In countries where the state field is not required, includes the State field as an optional entry.No– In countries where the state field is not required, omits the State field.
- When complete, click Save Config.
For more information about the State configuration options, see the Configuration Reference Guide.
Country Options
The Country Options identify the country where your business is located and the countries from which you accept payment.

Set the country options for your store
- On the Admin sidebar, go to Stores > Settings > Configuration.
- In the left panel under General, choose General.
- Expand the Country Options section.
NOTE
If needed, clear the Use system value checkbox for each setting you want to change.
- Choose the Default Country where your business is located.
- In the Allow Countries list, select each country from which you accept orders.
By default, all countries in the list are selected. To select multiple countries, hold down the Ctrl key (PC) or the Command key (Mac) and click each item.
- In the Zip/Postal Code is Optional for list, select each country where you conduct business that does not require a ZIP or postal code to be included as part of the street address.
- In the European Union Countries list, select each country in the EU where you conduct business.
By default, all EU countries are selected. To select the countries that you need, hold down the Ctrl key (PC) or the Command key (Mac) and click each item.
- In the Top Destinations list, select the primary countries that you target for sales.
- When complete, click Save Config.
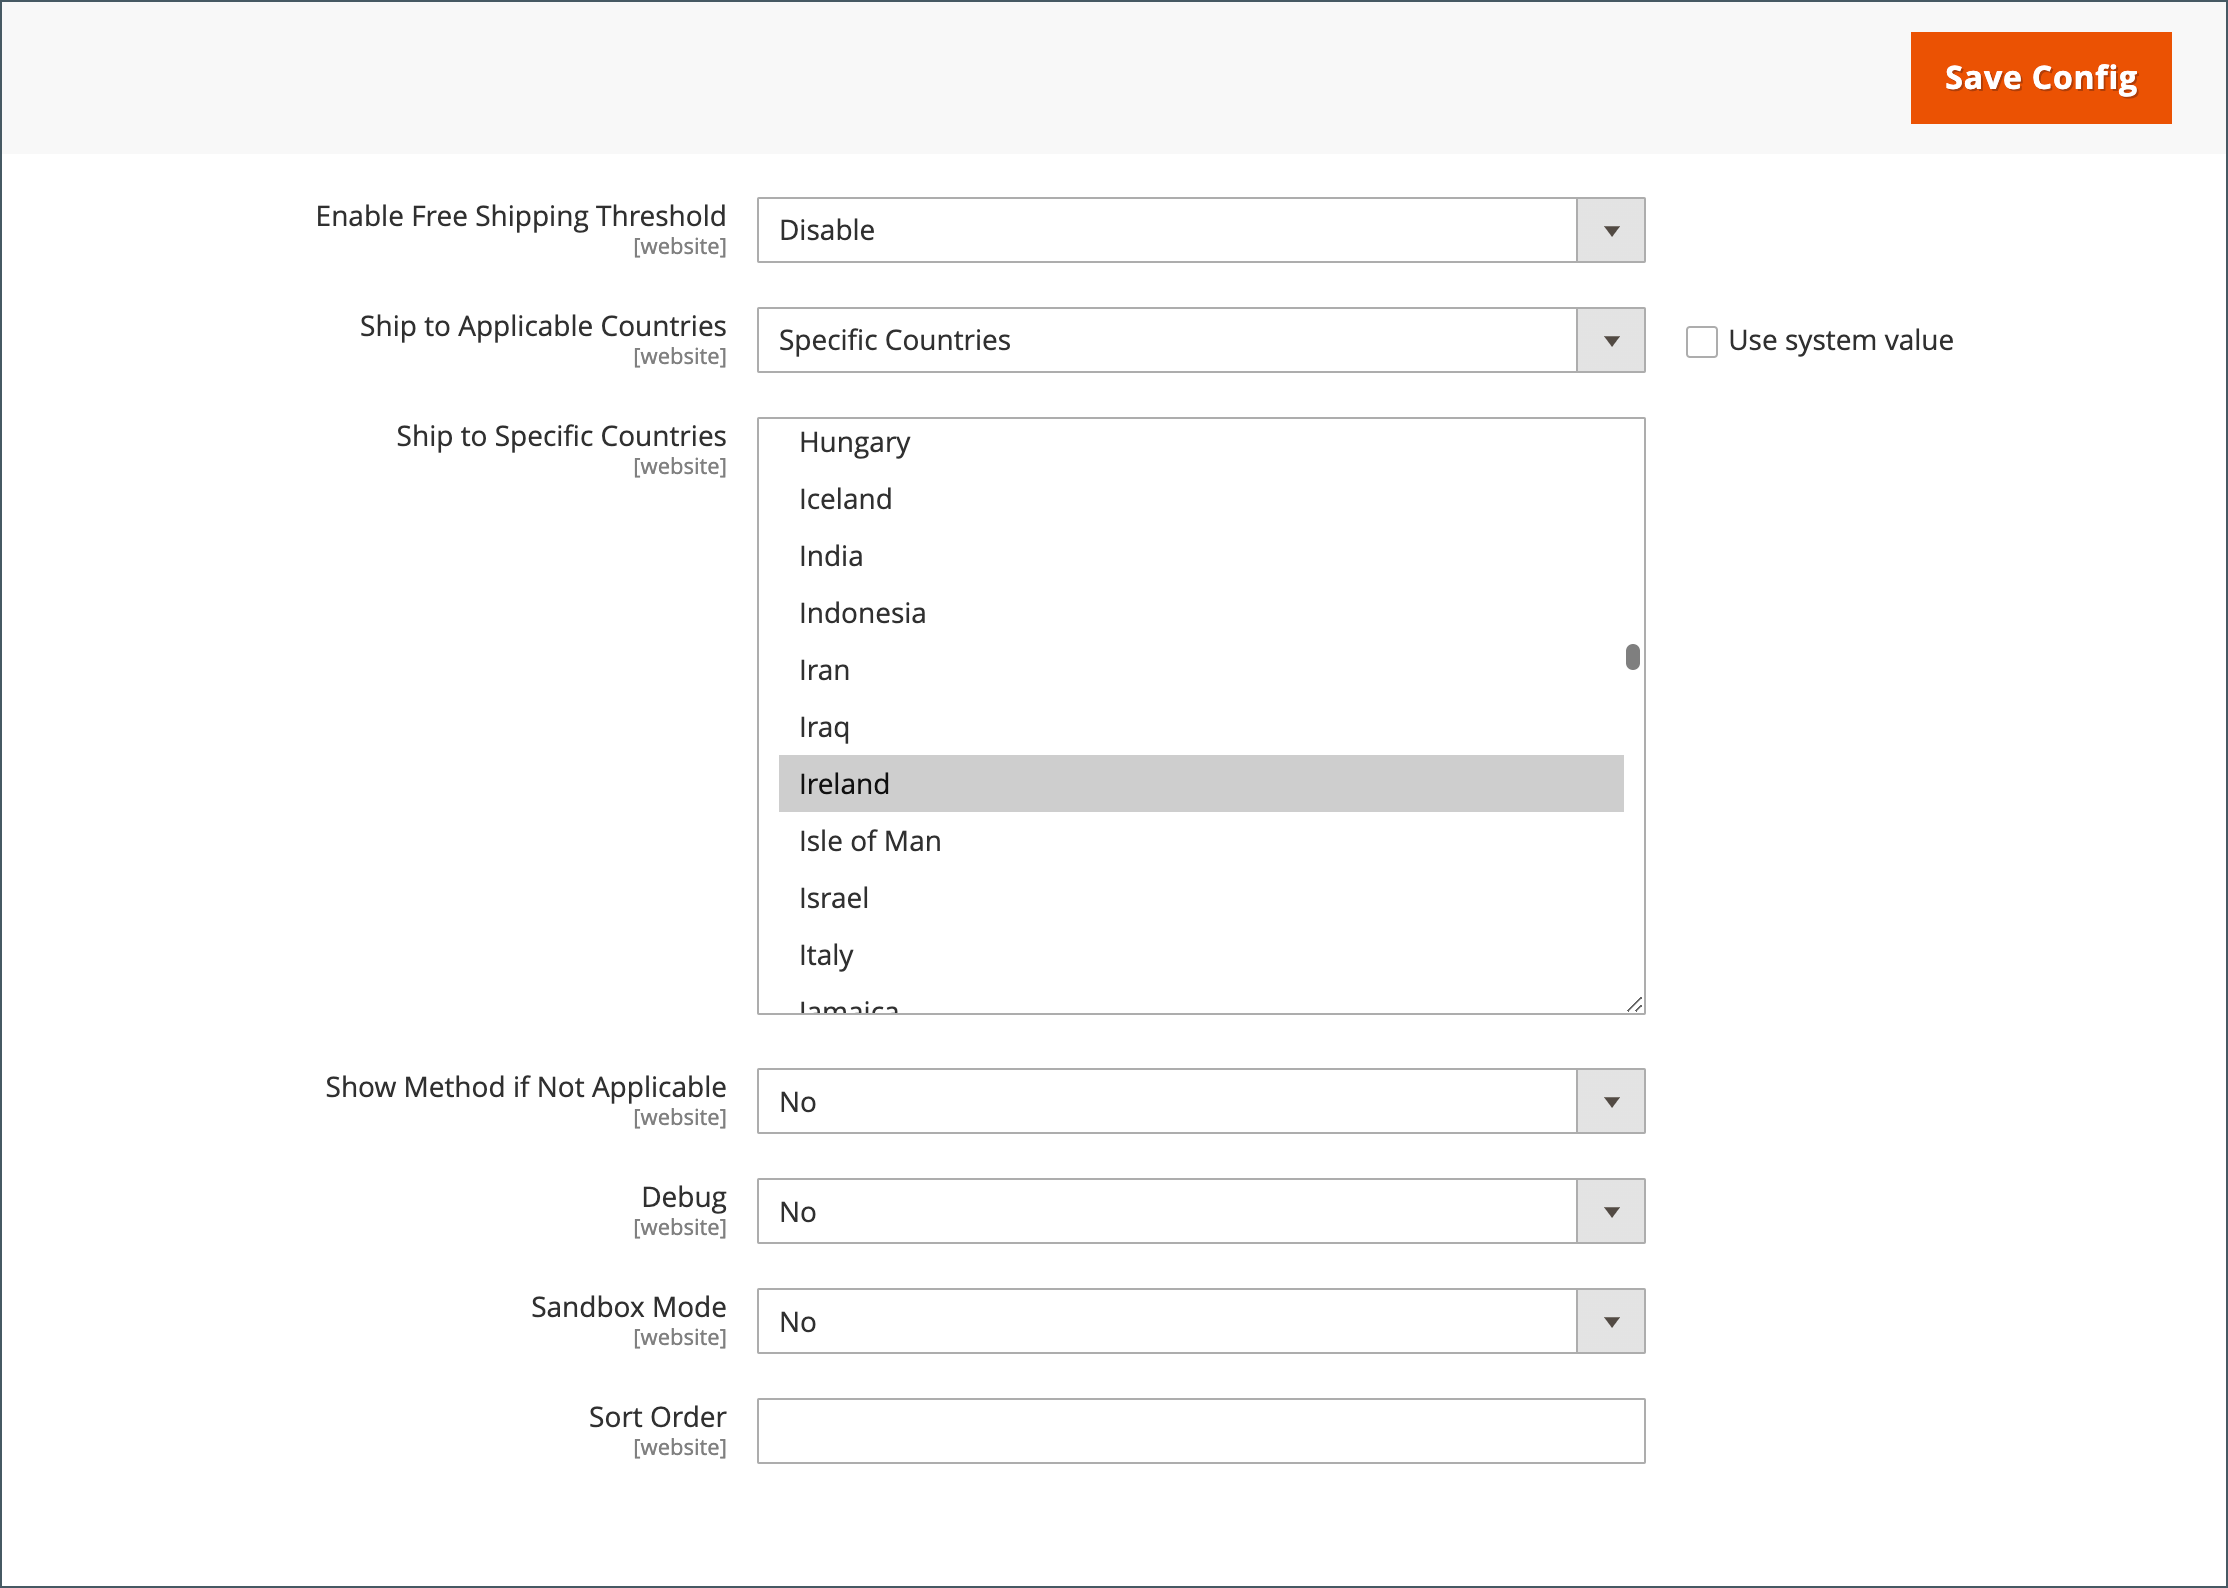
Set the country options for specific delivery method
You can also configure shipping to specific countries for each available delivery method (UPS, FedEx, and so on).
- On the Admin sidebar, go to Stores > Settings > Configuration.
- In the left panel, expand Sales and choose Delivery Methods.
- Select the shipping carrier to which you want to apply specific countries.
- For Ship to Applicable Countries, deselect the Use system value checkbox and select the Specific Countries option.
- In the Top Destinations list, select the primary countries that you target for shipping.
- When complete, click Save Config.
Troubleshooting resources
For help with troubleshooting country configuration issues, see the following Commerce Support articles:
Merchant Location
The Merchant Location setting is used to configure payment methods. If there is no value for this setting, the Default Country setting is used.
- On the Admin sidebar, go to Stores > Settings > Configuration.
- In the left panel, expand Sales and choose Payment Methods.
- Expand the Merchant Location section and choose your Merchant Country.

- When complete, click Save Config.
For more information about the Payment Methods configuration options, see the Configuration Reference Guide.
Currency
Currency Setup – Defines the base currency and any additional currencies that are accepted as payment. Also establishes the import connection and schedule that is used to update currency rates automatically.
Currency Symbols – Defines the currency symbols that appear in product prices and sales documents such as orders and invoices. Commerce supports currencies from over 200 countries around the world.
Updating Currency Rates – Currency rates can be updated manually or imported into your store as needed, or according to a predefined schedule.
Currency Chooser – If multiple currencies are available, the currency chooser is available in the header of the store.
Store Email Addresses
You can have up to five different email addresses to represent distinct functions or departments for each store or view. In addition to the following predefined email identities, there are a few custom identities that you can set up according to your needs.
- General Contact
- Sales Representative
- Customer Support
Each identity and its associated email address can be associated with specific automated email messages and appear as the sender of email messages that are sent from your store.
Step 1: Set up the email addresses for your domain
Before you can configure email addresses for the store, each must be set up as a valid email address for your domain. To create each email address that is needed, follow the instructions from your server administrator or email-hosting provider.
Step 2: Configure the email addresses for your store
- On the Admin sidebar, go to Stores > Settings > Configuration.
- Under General in the left panel, choose Store Email Addresses.
- Expand the General Contact section and do the following:

- For Sender Name, enter the name of the person that is associated with the General Contact identity to appear as the sender of any email messages.
- For Sender Email, enter the associated email address.
- Repeat this process for each store email address that you plan to use.
- When complete, click Save Config.
Step 3: Update the sales email configuration
If you use custom email addresses, make sure to update the configuration of any related email messages, so the correct identity appears as the sender.
- In the left panel, expand Sales and choose Sales Emails.
The page has a separate section for each of the following:
- Order and Order Comments
- Invoice and Invoice Comments
- Shipment and Shipment Comments
- Credit Memo and Credit Memo Comments
- RMA, RMA Authorization, RMA Admin Comments, and RMA Customer Comments
 (Adobe Commerce only)
- Starting with Order, expand the section for each message and make sure that the correct sender is selected.
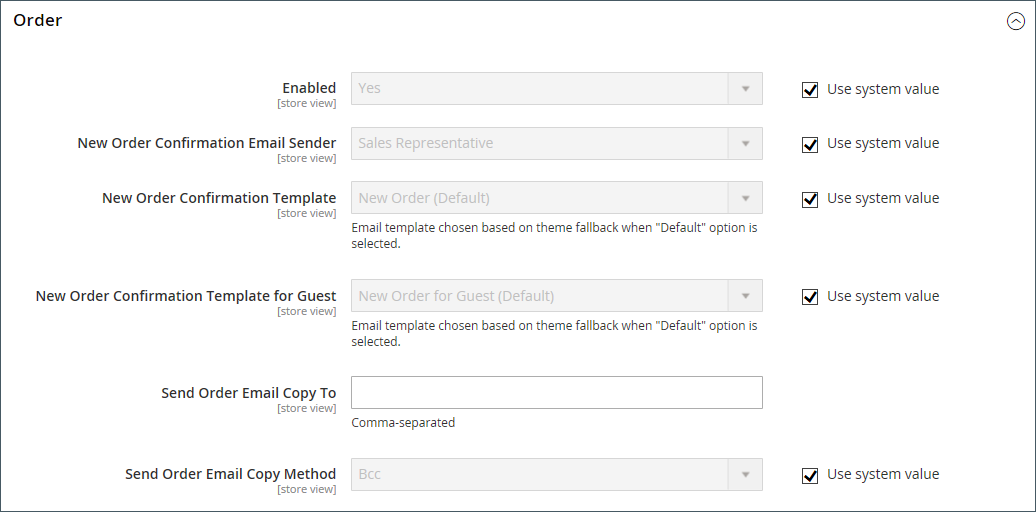
- When complete, click Save Config.
For more information about the Sales Emails configuration options, see the Configuration Reference Guide.
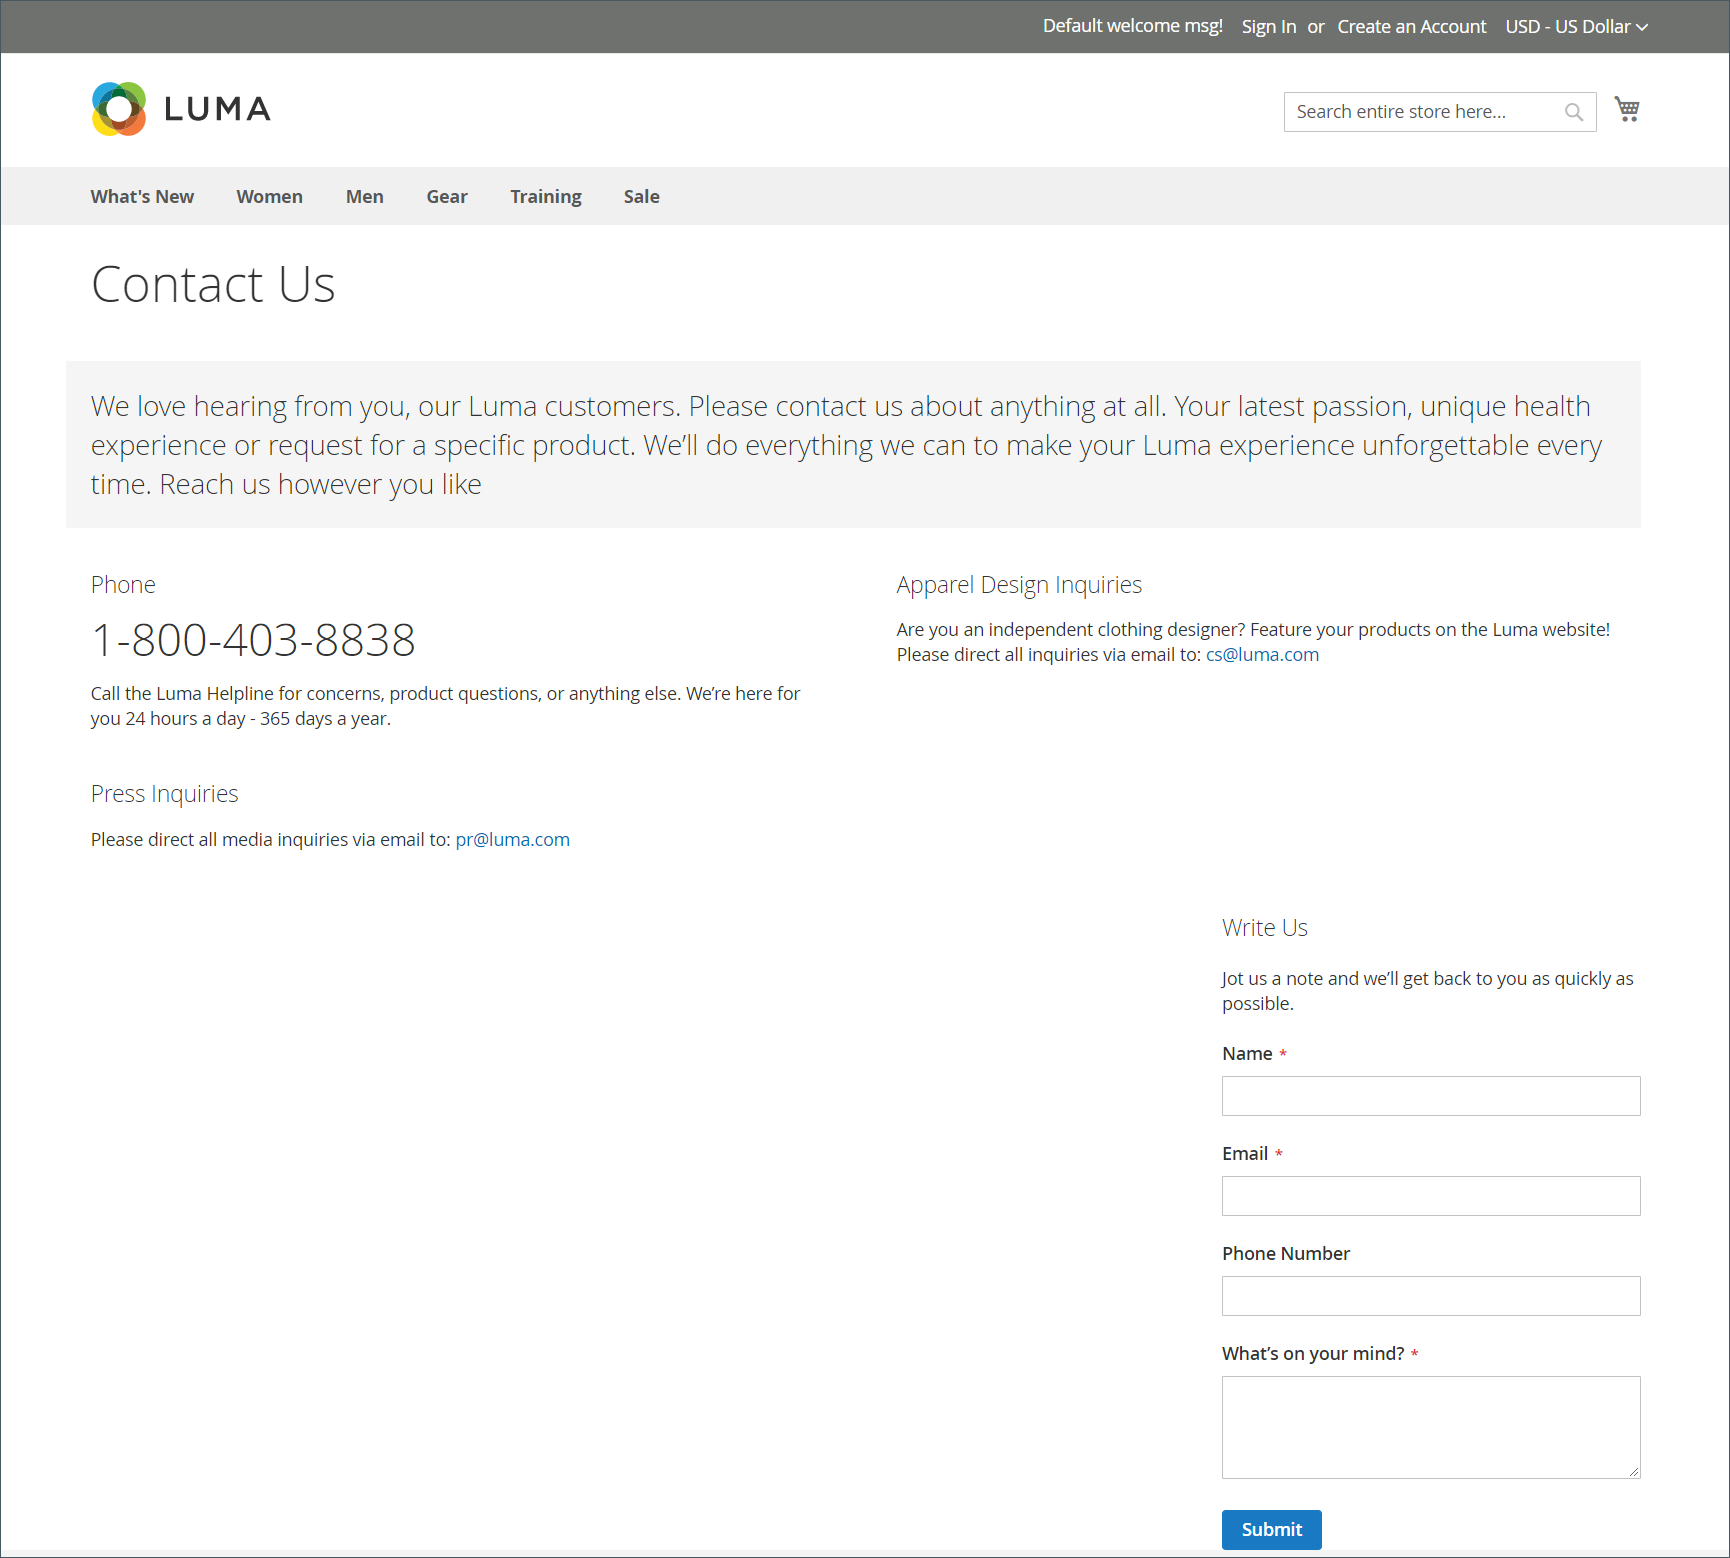
Contact Us form
The Contact Us link in the footer of the store is an easy way for customers to keep in touch with you. Customers can complete the form to send a message to your store. A standard Commerce installation displays the default Contact Us form. After submitting the form, a thank-you message appears
It is important to understand that the default Contact Us form is rendered directly from code rather than from a CMS page.

The store footer includes a link to the Contact Us page that is available throughout the store.

The Luma sample data includes additional information on the Contact Us page that demonstrates how you might customize the page for your store.
Configure the Contact Us form
- On the Admin sidebar, go to Stores > Settings > Configuration.
- In the left panel under General, choose Contacts.
- Expand the Contact Us section and set Enable Contact Us to
Yes.
- Expand the Email Options section and set the email contact options:
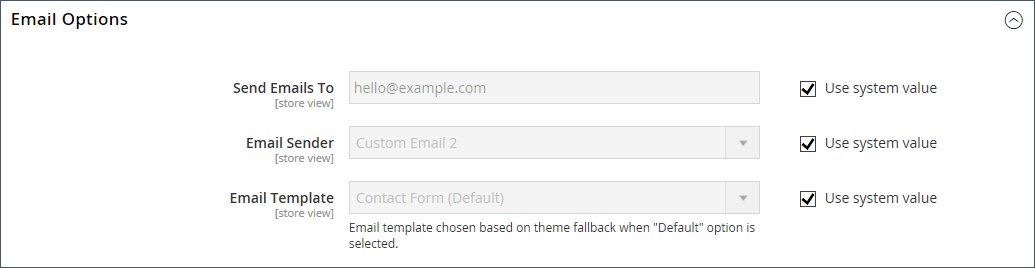
- For Send Emails to, enter the email address where messages from the Contact Us form are sent.
- Set Email Sender to the store identity that appears as the sender of the message from the Contact Us form. For example: Custom Email 2.
- Set Email Template to the template that is used for messages sent from the Contact Us form.
- When compete, click Save Config.
Customize the content
Method 1: Using sample data
The Luma sample data includes a Contact Us Info block that can be customized for your store. The
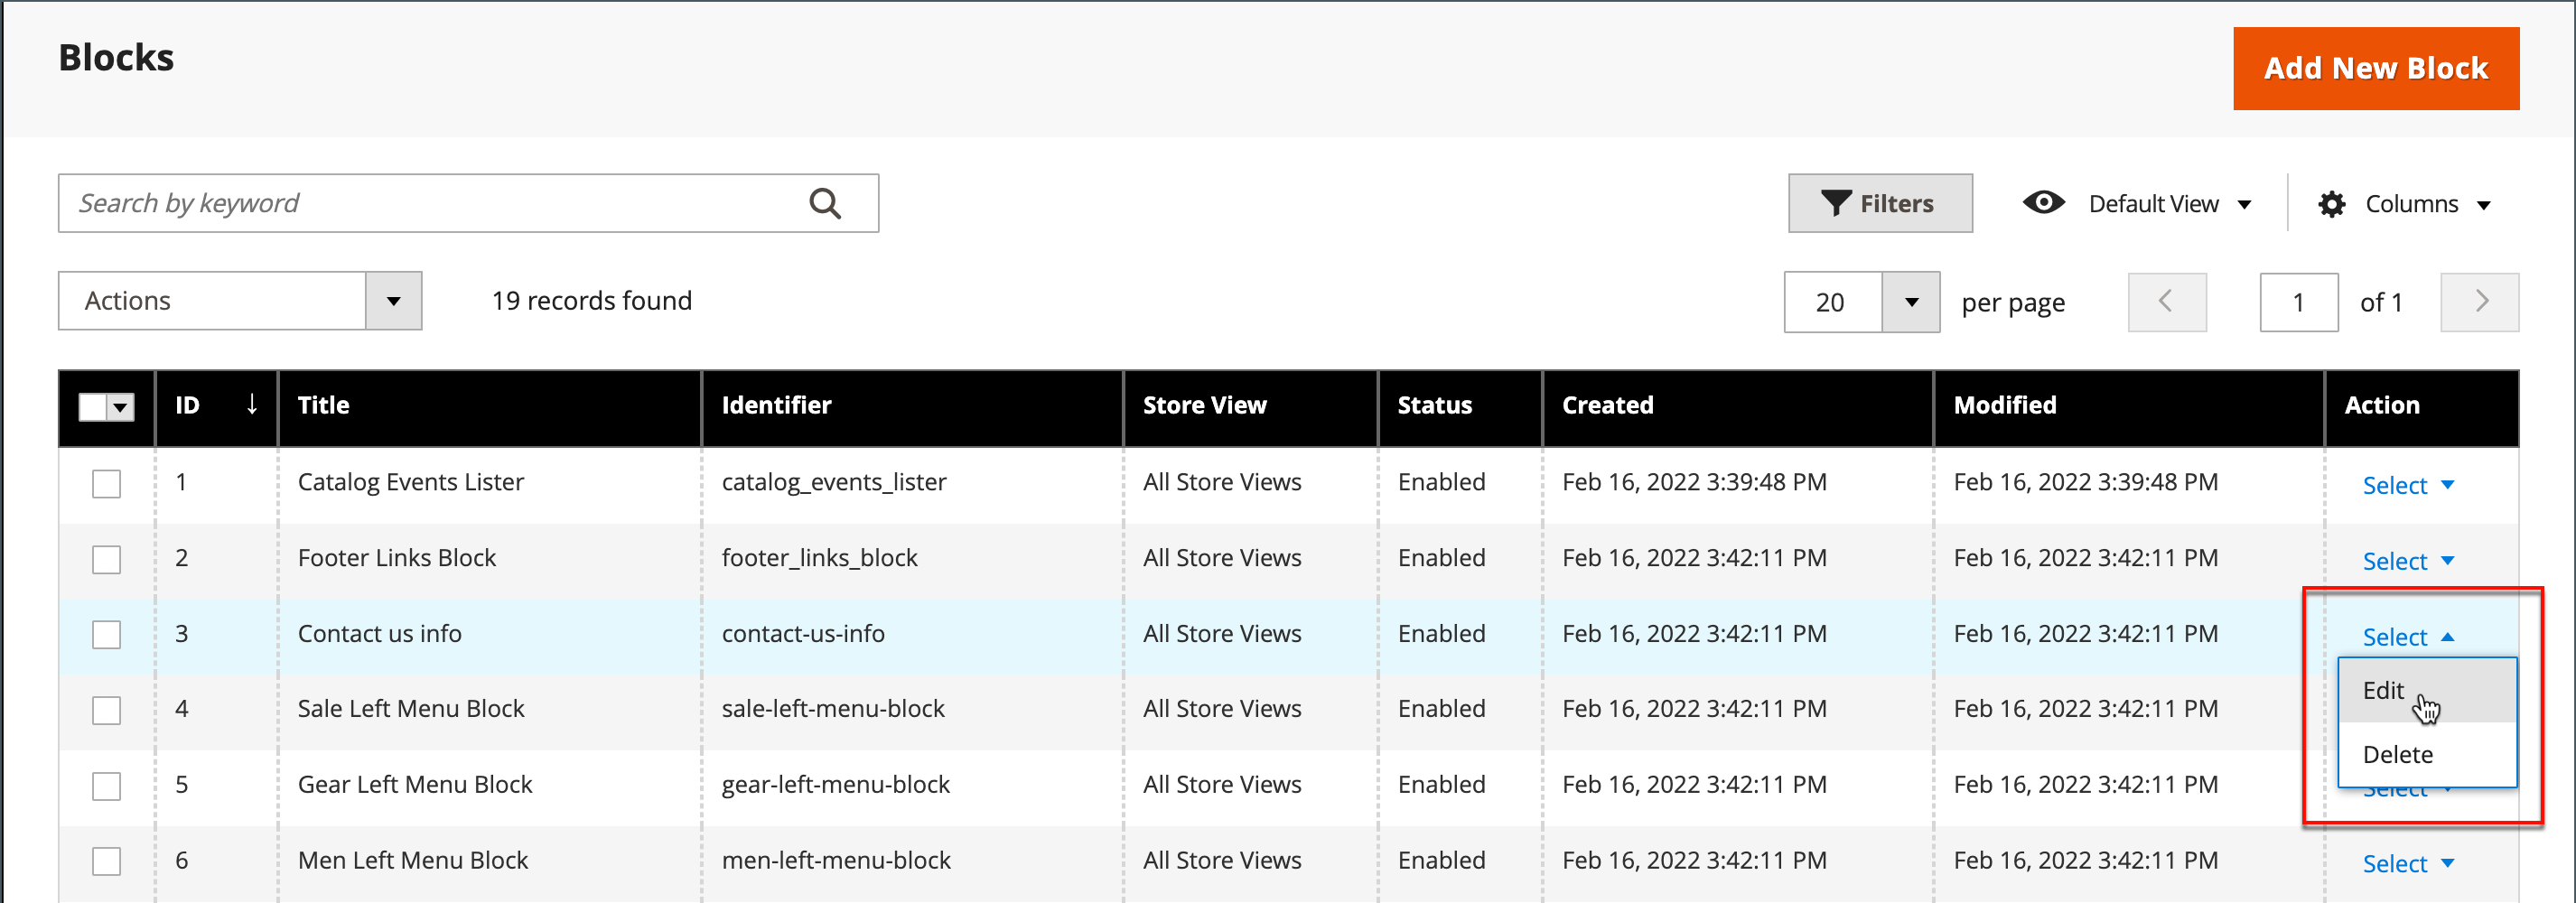
contact-us-infoblock can be easily modified to add your own content to the Contact Us page.- On the Admin sidebar, go to Content > Elements > Blocks.
- Find the Contact Us Info block in the list and open in Edit mode.
- Scroll down to the Content field and make any necessary changes.
- Use the editor toolbar to format the text, and add images and links.
- To work directly with the HTML, click Show / Hide Editor.
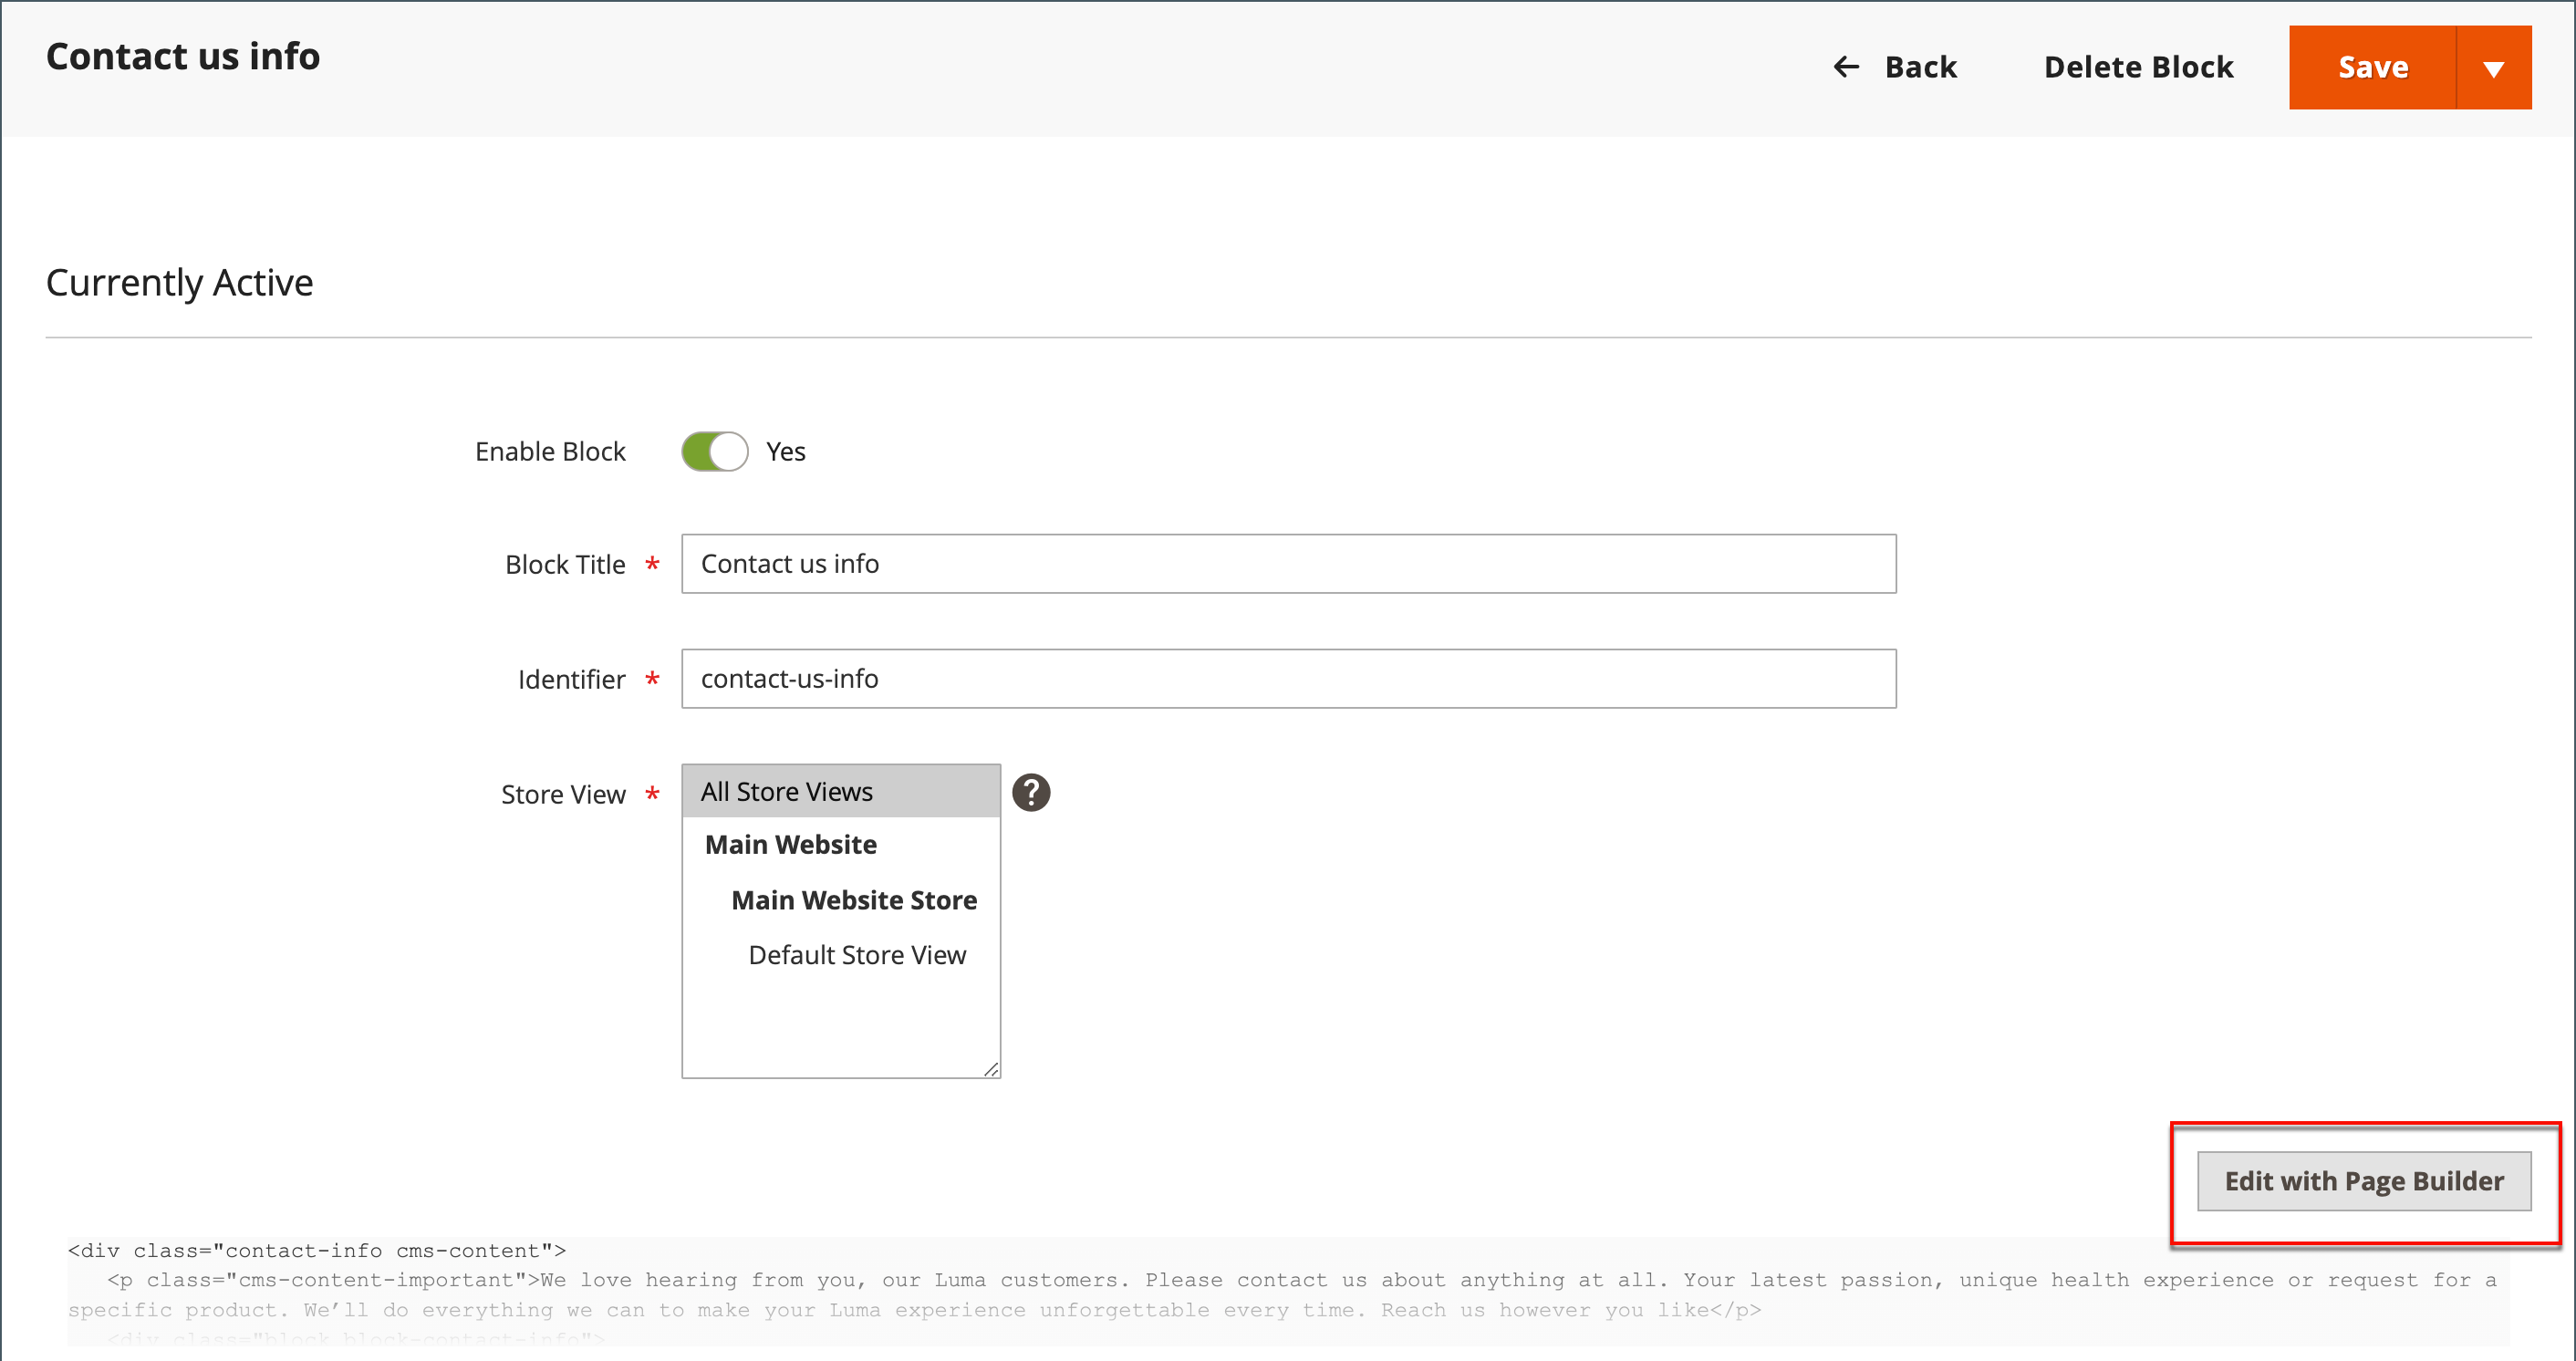
- When complete, click Save Block.
Method 2: Without sample data
IMPORTANTStarting with the 2.4.0 release, the contact form can no longer call inside a CMS block or CMS page. All customization of the contact form should be done using layout xml or custom theme templates.
By default, shoppers access the contact form using the Contact link in the footer of the storefront pages. For more information about customizing the contact page, refer to the Frontend Developer Guide.
-
-
AuthorPosts
- You must be logged in to reply to this topic.